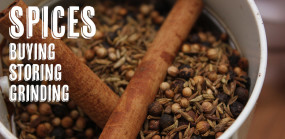
Buying, storing, and grinding spices (plus garam masala roasted salmon)
Of all the questions I get in my classes, many of the most common ones are about spices – where to buy them, how to use them, how long to keep them. We’re quite plagued, it seems, by this scary little piece of advice to keep spices for 6 months or less.
So, what’s the deal?
I hate to say it, but that piece of advice is mostly right. What gives spices their flavors are the essential oils inside, and from the moment spices are ground they start releasing those oils, meaning flavors continue to dissipate as time goes on. It’s not that spices will go bad in six months or develop bad flavors (unless they go rancid, which takes considerably longer) – it’s that they continue losing flavor as they sit in those jars in your cupboard. (For that reason, whole spices will keep longer – I’d say one year-ish is fine by me.) By the time you use up that ground cumin that’s been in your spice collection since 2012 (and ground who knows how many months or years before that), the flavor is likely to be a mere hint of what it could have been.
So what’s the alternative? In a perfect world, everyone would buy small amounts of whole spices as needed, from a source with high-quality, fresh supply, and then toast and grind them in small batches for use. That sounds slightly insane, I know. To follow that 100% is utterly impractical for most home cooks. But here are some things to keep in mind, and what I try to follow where I can.
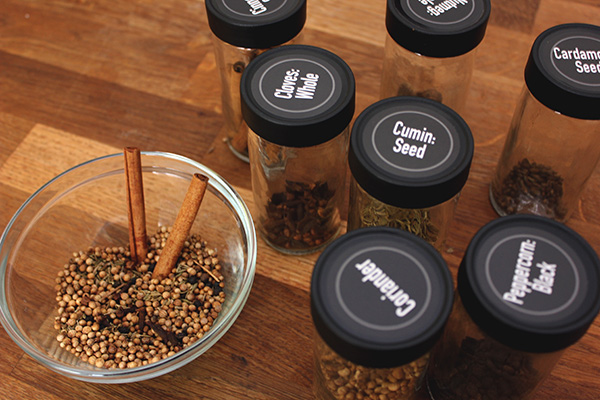
- Buy some whole spices I’m unlikely to grind all of my own spices at home, but I do generally try to use whole cumin and coriander, which are flavors I rely on most often in my cooking. And nutmeg, which is easy to quickly grate on a Microplane grater and has amazing flavor fresh. Some spices I keep in ground and whole form, like cinnamon (sticks and ground), cardamom (pods and ground), cloves (whole and ground). And others, like paprika, ginger, and turmeric, I only have in powdered form. If you’re going to start grinding/grating some of your own spices at home, I suggest starting with cumin, coriander, and nutmeg – they’re commonly used and easy to process. I’ll talk more about grinding and grating below.
- Use a good source When you can, buy spices in small quantities from good sources. I love utilizing bulk spice options (Willy Street Co-op, Whole Foods, etc.) because I can get just what I think I’ll use rather than a huge jar of it that will take forever to use. Penzey’s and The Spice House are excellent options (and local Wisconsin companies!) for high-quality spices, and offer some smaller quantities. Much of the time, ethnic markets are wonderful sources for spices (especially Indian markets) because turnover is high and the product tends to be fresher.
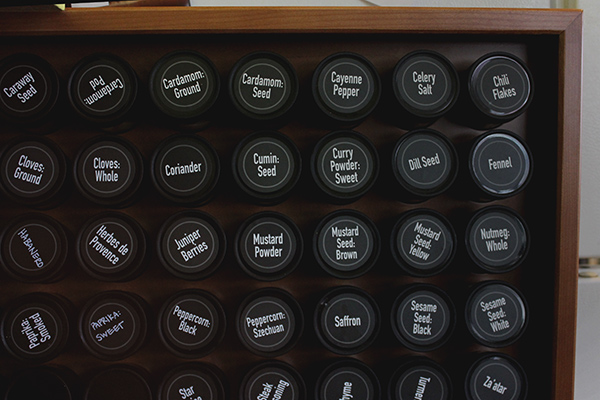
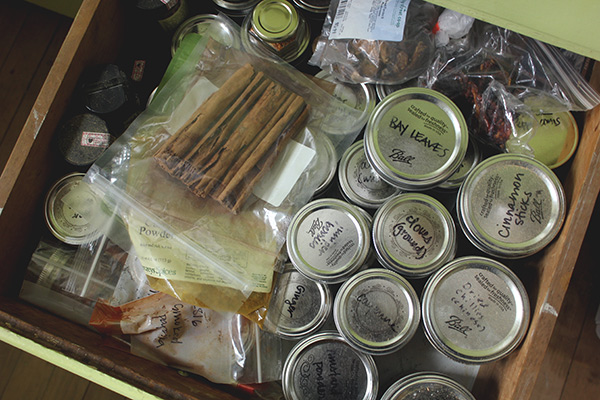
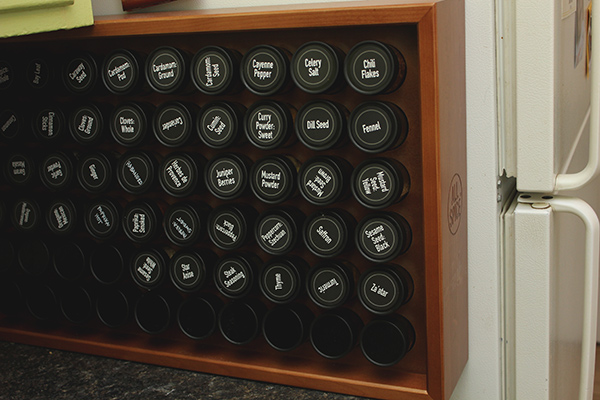
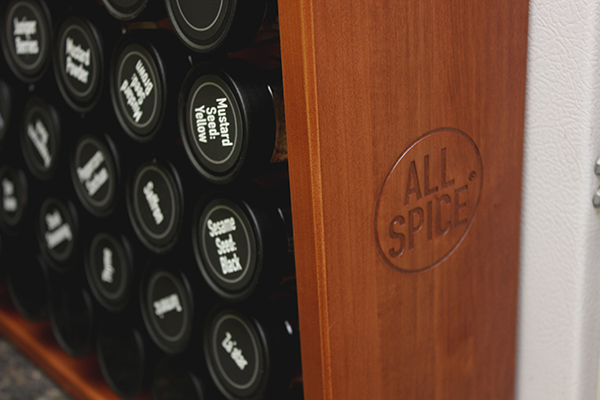
- Store your spices well Again, in an ideal world, all spices would be stored in opaque containers in the freezer and left to come to room temperature before opening the container (to avoid condensation build-up). HA! Totally impractical. Most important is that you store your spices in airtight containers away from light and heat. Until recently, I stored spices in a jumble of small canning jars, plastic bags, and other containers in a drawer in my kitchen. It worked okay, but the Sharpie-written labels wore off constantly and everything shifted around in the drawer, making things impossible to find. But part of the inspiration for this post was an opportunity to work with AllSpice Spice Racks, a Wisconsin company supplying gorgeous, solid wood spice racks ready to fill with your spice collection. I am absolutely loving having all of my spices out to see and ready to use. (More on my new spice rack below, including a discount code!)
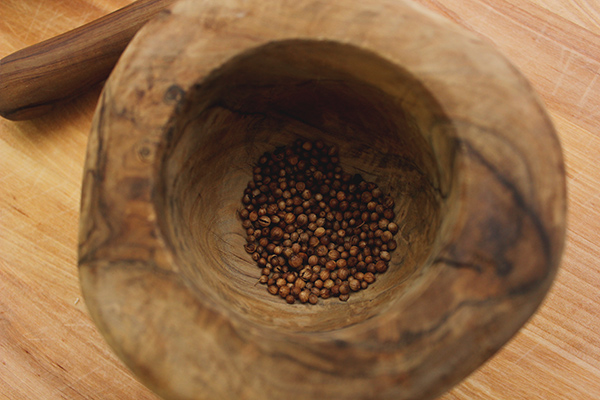
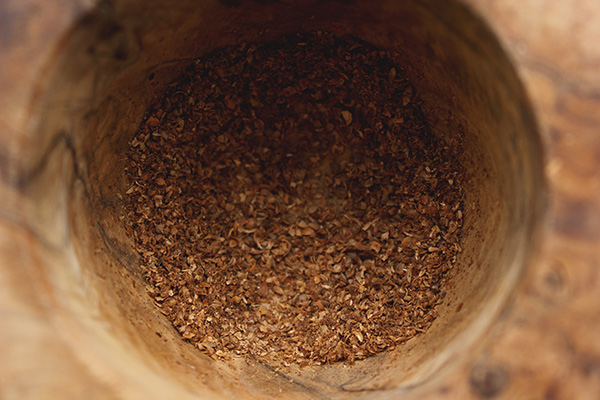
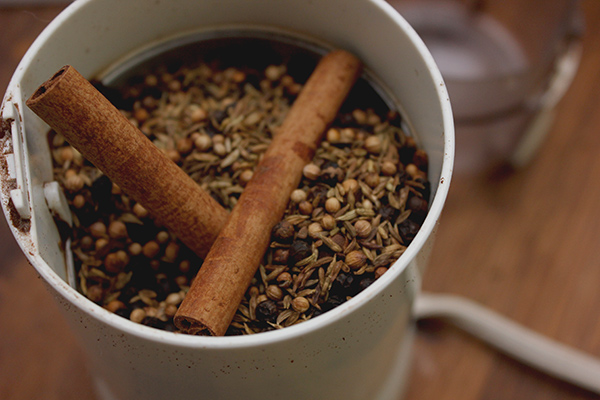
So. Now that you have a well-stored, high-quality selection of spices at your disposal, how to use them? Most whole spices can be toasted in a dry pan to start releasing flavors, then ground in a mortar and pestle or spice grinder – a basic coffee grinder works wonderfully. (After each spice-grinding session, grind a bit of uncooked rice and wipe it out to clean out contaminating flavors.)
What does this process look like? If I need 1 tsp. of ground coriander in something, I heat a dry skillet over medium heat, add just about 1 tsp. of coriander seeds, and let them toast, stirring frequently, until fragrant and starting to darken, which usually takes about 3 minutes. I immediately transfer them out of the pan to keep them from burning, either right into the mortar and pestle or grinder or into a bowl or plate until I’m ready to grind them. I generally can’t get spices quite as finely ground using my small wooden mortar and pestle, but that’s totally fine. When you start to grind, you’ll immediately smell the difference! If you’re sensitive to additional spice levels or don’t want to add too much extra flavor, you might not want to use the whole amount called for in the recipe (your freshly toasted and ground spices will have WAY more flavor!).
Nutmeg is one of a few exceptions that isn’t toasted and ground, but rather grated (whole nutmeg is way too large and too hard to grind like other spices). I like to use a Microplane grater for this, but the small holes on the side of a box grater work wonderfully as well.
There are many other ways whole spices are used, like frying in oil before incorporating into a dish (that’s common in Indian cuisine). For the sake of time and length today, I’ll have to go into that in a future post.
Where’s a good place to start? Homemade garam masala is a fantastic way to feature your new spice toasting and grinding skills! Garam masala is a blend of spices meant to add a sense of warmth to Indian and other foods, and like curry powders and other blends it can feature a variety of different spices but generally includes black pepper, cinnamon, cloves, coriander, cumin, and cardamom. It’s often added to dishes in cooking and as a condiment afterward, set on the table for sprinkling and adding extra flavor.
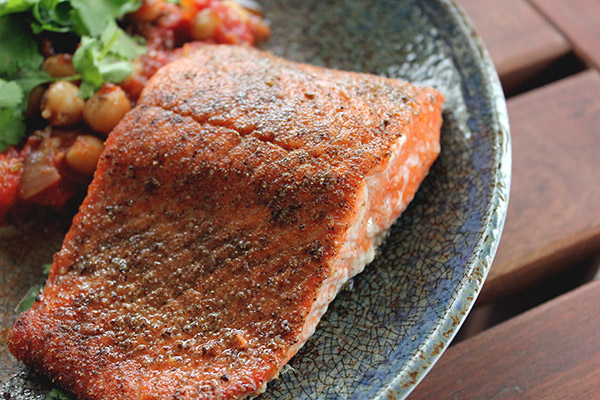
I’ve used this batch of garam masala in Molly Wizenberg’s gorgeous chana masala and an awesome tomato-tamarind chutney from Madhur Jaffrey’s book An Invitation to Indian Cooking, but my favorite use so far put the spice blend front and center – fillets of wild salmon coated in garam masala and garlic powder (which I got from a local farm last summer) and pan roasted. It was a lovely and easy recipe to pair with other Indian dishes (many of which take significantly more effort), and highlighted the spices wonderfully.
You can see more about AllSpice Spice Rack’s options on their website. Without pre-counting my spice collection I chose the largest, 60-capacity rack, which leaves me some room for growth, but they offer two smaller versions as well. It’s solid wood and quite substantial, leading me to believe it will last a long time and continue to be a very useful piece of kitchen furnishing. It comes with empty jars plus a selection of shaker tops and preprinted labels (which were very impressive in their selection – I only had to write in ground habanero, sweet and spicy paprikas, and Aleppo pepper). Want one for yourself? Use discount code BOWEN for 10% off your new rack.
Garam masala
Makes about 1/4-1/3 cup
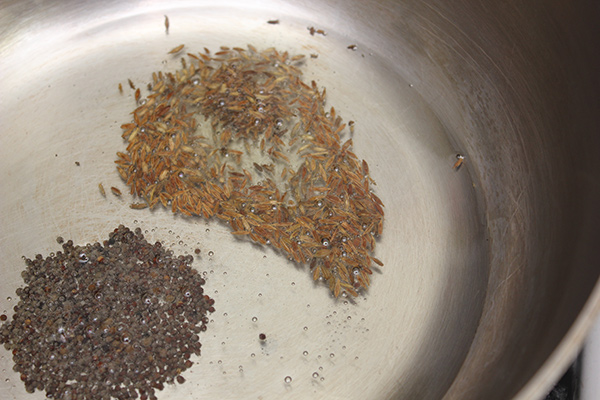
- 2 cinnamon sticks
- 18 cardamom seeds (no pod)
- 2 Tbsp. black peppercorns
- 2 Tbsp. cumin seeds
- 2 Tbsp. coriander seeds
- 8 cloves
- 1 tsp. grated whole nutmeg (or ground nutmeg)
– Toast whole spices Heat a dry skillet over medium-high heat and add all whole spices (everything but the nutmeg). Cook, stirring frequently, until fragrant and slightly darkened, 2-4 minutes. Immediately transfer out of the pan (to your grinding device of choice or a small bowl or plate).
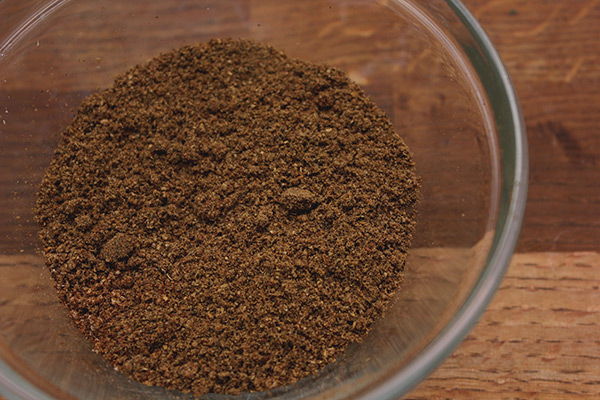
– Grind spice mix Transfer toasted spices to a heavy mortar and pestle or spice grinder (a basic coffee grinder works wonderfully) and grind until powdery. If large chunks of cinnamon stick are stubborn and won’t grind, remove those.
– Add nutmeg Grate whole nutmeg or add powdered nutmeg to the mix and combine.
Making ahead/storage: Garam masala is most flavorful fresh and within the first few days, but it can be kept as other ground spices are for up to 6 months. (After that, it’s definitely best to make a new batch for fresh flavors.)
Garam masala salmon
Makes 2 servings
- 2 6-8 oz. fillets of salmon, preferably skin-on
- 1/2 tsp. garam masala (see recipe above)
- 1/4 tsp. garlic powder (optional)
- Large pinch salt
- High heat oil (coconut oil works wonderfully)
– Heat oven to 375F.
– Prepare and cook fish Combine the garam masala, garlic powder (if using), and salt in a small bowl. Coat each fillet on all sides with the spice mixture. Heat an ovenproof skillet (no plastic handles unless they’ve been rated to at least 375F!) over medium-high heat. Add a large splash of oil (enough to lightly coat the bottom of the pan) and immediately add the fish, skin side-up. Cook undisturbed for a few minutes, or until the fillet has seared on the bottom and releases easily from the pan. Flip the fillet over (skin side-down) and slide the pan into the oven and roast until desired doneness. Timing depends on how much of the fillet cooked on the stove and how thick the fillet is, but I find another 5 minutes is usually sufficient (I generally like my salmon on the rare side in the middle).
Making ahead/storage: Fish is generally best freshly cooked, though salmon is generally quite good as leftovers. It will keep in the refrigerator for up to 3 days and can be gently reheated in a pan over medium heat.
Disclosure: AllSpice Spice Racks sent me the rack pictured above to use for my spice collection and to write about here. As always, I only partner with high-quality products and companies I truly love!